I made this simple system for the toy trains of my little baby.
It is really simple.
The BOM (Bill Of Materials)
1 – Arduino UNO board
2 – Some wires
3 – A piece of thin cane
4 – A servo motor
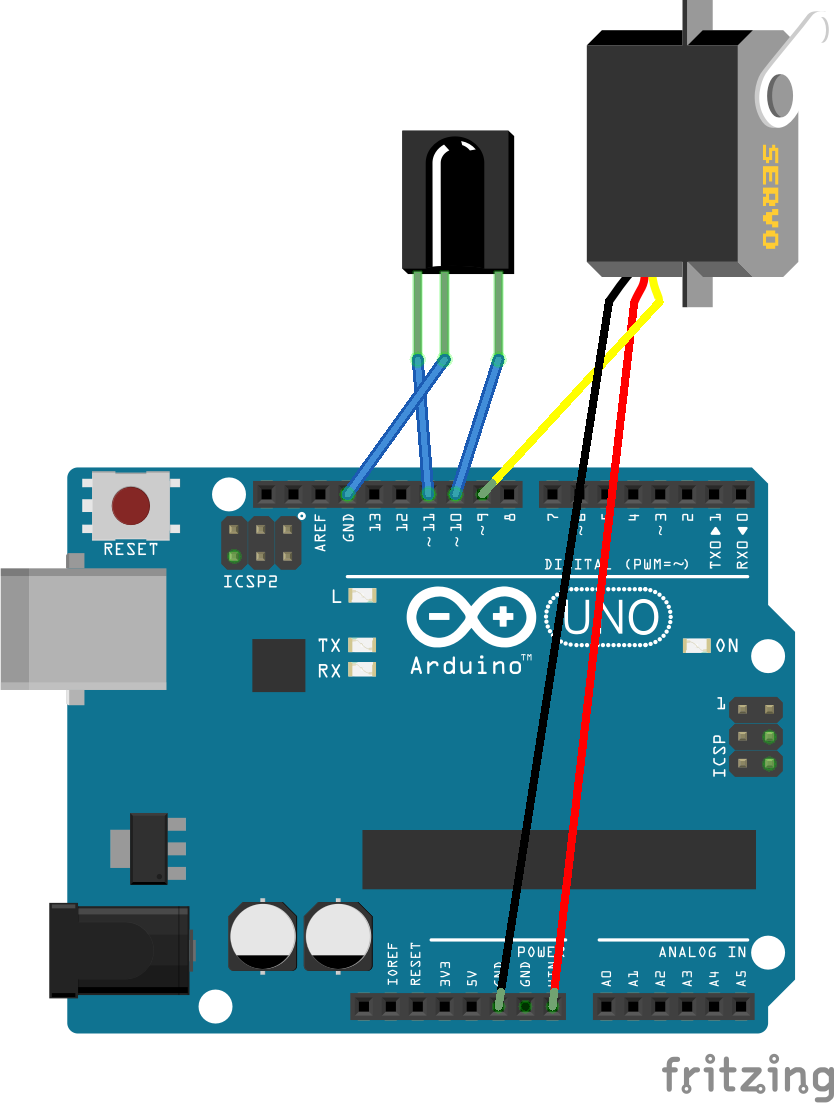
Connect your components as shown in the following picture, then use some glue to put together the thin cane with the servo motor.
The following short video shows my system in action
The last step is to load the sketch into the Arduino UNO board.
This is the code for the sketch:
// Simple RailCrossing
// www.xappsoftware.com


#include <Servo.h>

Servo myservo;  // create servo object to control a servo

int pos = 0;    // variable to store the servo position
int ledPin1 = 11;
int ledPin2 = 10;
int light;

void setup()
{
  myservo.attach(9);  // attaches the servo on pin 9 to the servo object
  pinMode(ledPin, OUTPUT);
}


void loop()
{
  for(pos = 0; pos < 90; pos += 1) // goes from 0 degrees to 90 degrees
  {                                // in steps of 1 degree
    myservo.write(pos);            // tell servo to go to position in variable 'pos'
    delay(5);                      // waits 5ms for the servo to reach the position
  }
  digitalWrite(ledPin1, HIGH);     // Green light on
  digitalWrite(ledPin2, LOW);      // Red light off
  delay(5000);
  for(pos = 90; pos >0; pos -= 1)  // goes from 90 degrees to 0 degrees
  {                                // in steps of 1 degree
    myservo.write(pos);            // tell servo to go to position in variable 'pos'
    delay(5);                      // waits 5ms for the servo to reach the position
  }
  digitalWrite(ledPin2, HIGH);     // Green light off
  digitalWrite(ledPin1, LOW);      // Red light on
  delay(5000);
}
Gg1